How many lamps do you think one twenty-four-foot diameter yurt requires? My answer is six, not including the three-bulb lighting/ fan that dangles from the dome!
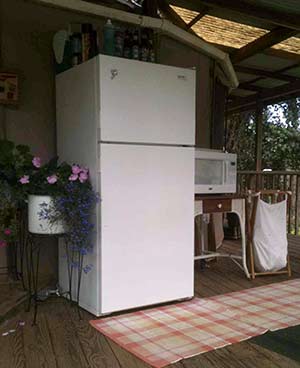
Yurt’s Outdoor Kitchen
The decorator in me whipped into gear. Thankfully, God had prepared me for this unique challenge. My thirty years of unofficial interior design training included living in seven homes ranging from a two-bed/two-bath condo, to a 1926 Craftsman, to our custom-built, five-bedroom, three-and-a-half bath home in Big Bear. I absolutely love the challenge of a decorating project. My first step is to grab my pad of graph paper, sharp pencil, and measuring tape. Then, I measure every room, noting all doors, windows, builtin cabinets, and other elements that need to be taken into consideration when placing furniture. But how does one accomplish this task when the structure is 2,500 miles across the deep blue sea? Recently, as I put the finishing decorating touches on the newly constructed guest studio bathroom, also located on our rented twelve acres, Bailey’s wife, Baki, asked about my “training.” “Hmm … Well … I haven’t had any formal training,” I offered, as I attached a shower curtain to its slightly curved tension rod. “Really? How did you learn to do what you do?” she inquired. Feeling like a deer in the headlights, I quickly explaining that it was something I just naturally enjoyed, that I had learned through trial and error, and maybe it was a gift. In the most professional voice I could muster, I explained that the real challenge is in understanding who the client is, their lifestyle, as well as their personal decorating tastes. “Well, what would you have learned if you had gone to school,” she asked, as she assisted Bailey in hanging a “some assembly required” shelf of espresso coffeestained wood. I mumbled something about color, scale, and understanding various design periods, feeling like a quarterback trying to launch the football with NO receiver in sight. Later, as I sat at my thirty-year-old Husqvarna sewing machine, whipping up three window curtains utilizing two water-repellent shower curtains, (two of these curtains would actually hang in the shower stall), I reminisced of the unique experience of decorating our rented yurt. Pat just loves to sing my decorating praises when visitors stop by to talk story.
Here’s the scenario:
They enter through the front door, the only door, I might add. They stop, do a three-hundred-sixty-degree visual scan of the interior, and then say something like, “Wow! This looks great.” Some are perceptive enough to notice the multi-room concept. This opens the door to Pat’s “praise” part. “Yep! She did all this from Big Bear, on graph paper, and every piece of furniture fit perfectly.” Then we casually mention the five-in-one room concept. “This yurt contains a kitchen, dining room, living room, bedroom, and office,” we say, smiling from ear to ear. As they make another visual scan, reality sinks in and they begin to scratch their heads. It’s true! Prior to our move, I called Bailey, requesting the exact yurt dimensions and any photos he had of the interior. (Thankfully, on reconnaissance trip number three, we had stayed in the guest studio and had taken a quick peek into the unfurnished yurt.) Let me simply and lovingly say that the pictures he sent were very helpful in viewing the bones of the yurt—size of the kitchen, placement of the eight windows, location of the door—but offered very little in the area of furniture placement and decorating prowess. Bailey was not a decorator, bless his heart! No worries! Pat and I had no idea as to the length of our upcoming yurt stay. My friend, Sherri, insisted I wouldn’t last six months! In my heart, I felt we would be there at least a full year. Only God knew for sure. So it was important that the yurt be comfortable as well as serviceable for the duration of our stay. As I previously mentioned, I am a nester. I determined which furniture pieces I wanted with me rather than packed into the deep recesses of a storage unit. I measured these pieces and then began the fun of creating a layout that would provide for our needs. Seeing everything drawn to scale on graph paper provided me with the confidence that it would actually fit in the yurt.
Here are the furniture pieces that graduated from storage to yurt:
- The queen-size bed rather than the California King, along with a new woven-reed headboard, compliments of Pier 1 Imports. Snuggling is a good thing!
- The antique oak dining table rather than the farm table. I love the oval shape and the four recently purchased chairs have that island flair.
- Two Birdseye Maple chest of drawers for folded clothing, plus the coordinating armoire for additional clothes, purses, linens, and sewing items.
- Our three-person couch, along with two chairs and matching ottomans, both in the island motif.
- My small-scale antique oak bookcase, perfect for décor items and books.
- A rolling rod for our hanging clothes. (There are no closets in the yurt.) This, I ordered from a work resource.
- We sold Pat’s desk, and I traded our sectional couch, round ottoman, and matching curtains for friend, Sherri’s, Ballard Designs white desk, which was an exact duplicate of the one I use in my home office. I decided to place these two desks back-to-back, creating a tiny “yurt office.”
- One small, low bookcase at the end of our desks to hold books, framed family photos, and other knick-knacks.
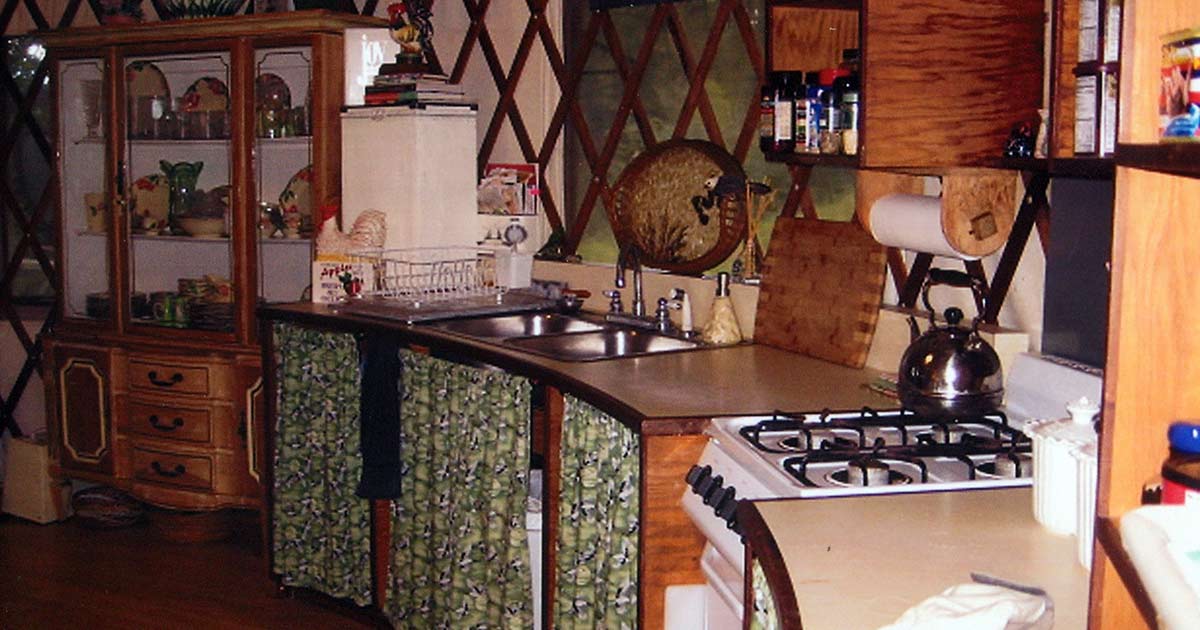
- A small-scale vintage china hutch, purchased from a Big Bear consignment shop, to provide much-needed storage space for our glassware, Franciscanware Desert Rose dishes, assorted coffee mugs, flatware, and cooking utensils.
- An antique nickel heater, embellished with glass jewels at the base, to serve as a tiny side table next to the couch, and a vintage cook stove set between our two occasional chairs, also as a side table.
- Two 5’ × 7’ woven rugs to delineate the dining room from the living room.
- Thirteen woven baskets and six plastic storage bins to be tucked under all cabinets and the bed.
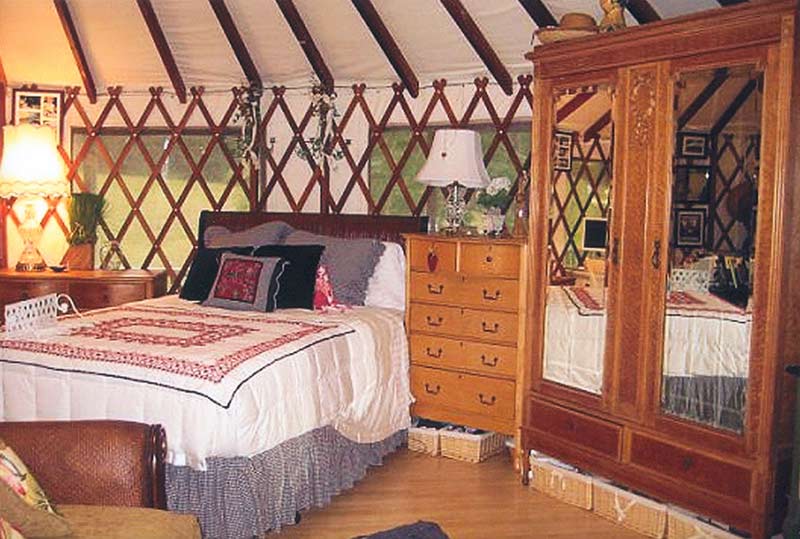
Yurt Bedroom
I am a lighting fanatic! Years earlier, Sherri and I took off for Brimfield, Massachusetts, to attend their world-famous antique show. We could hardly wait to tramp through ten acres of farm fields miraculously transformed into the Country’s largest and finest example of a shopaholic’s dream come true! Before we left for Brimfield, I noted my decision to not purchase any lighting. (I already possessed more lamps than one housewife could possibly use.) On our way to the airport, suitcase, and extra suitcase with bubble wrap in tow, I reminded Sherri of this very important “shopping boundary.” But a strange thing happened as we happily wheeled our vintage shopping cart up and down the ten acres of antique dealers … “Sherri, I really don’t need this!” as I purchased an alabaster lantern, a glass globe, and three other assorted lighting elements. She just rolled her eyes. So much for boundaries. Why do I mention this? Because I had the worst time determining which of my favorite lamps would make the cut and find their way into the yurt. How many lamps do you think one twenty-four-foot diameter yurt requires?
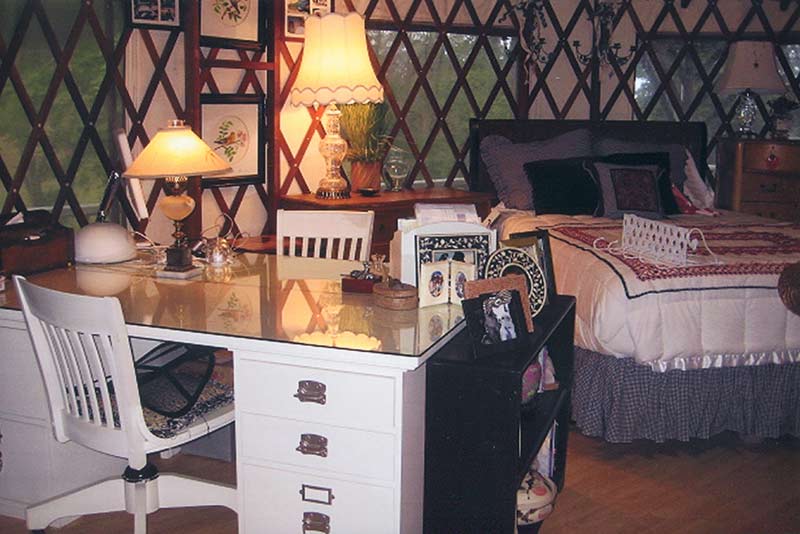
Yurt Office / Bedroom
My answer is six, not including the three-bulb lighting/ fan that dangles from the dome! About nine months into our yurt experience, my phone began to ring, and my Yahoo inbox filled with messages from friends and family, indicating that HGTV’s Design Star would soon air a segment whereby their three finalists would each take on the challenge of decorating a yurt bedroom. This sounded very interesting to me because I was sure I would pick up some great decorating tips from these “professionals.” After all, hadn’t they gone to design school, boasting years of practice in the field? I was prepared to be humbled. A few weeks later, and after insisting that Pat record the segment, we both settled onto our comfy couch to learn from the experts. As the sixty-minute challenge progressed, it became obvious to both of us that these three finalists knew absolutely nothing about the challenges of scale and functionality in a small, circular space. All three “experts” designed a bed situation that resembled an elephant crammed into a tiny pantry. One designer cleverly created a bed on wheels that held a clothes rod behind the tall, flat headboard. My question? Where did she plan to move that behemoth of a bed? None of the three design finalists included a closet or dresser for storage of personal belongings. One designer did incorporate a quaint seating area at the foot of the bed. She got my vote. At one point, Pat leaned over and announced, “If they really want a design challenge, they should require the designers to decorate the yurt while living 2500 miles away, utilizing used furniture, and no budget. Now that would be a real challenge. And, Jen, that’s exactly what you did!” I sat contemplating his announcement. He was right. That was my design challenge. And somehow, it all worked! Over the next few days, I went into creative mode, allowed my mind to place me into the HGTV Design Star Challenge.
How would I have designed a yurt bedroom? This is what I came up with:
- Build a queen-size headboard that follows the curvature of the yurt wall.
- Add a bedside table and a wall sconce or swivel lamp.
- Include a comfy chair with ottoman, perfect for quiet times of contemplation or reading.
- Add another properly proportioned side table with a small crystal chandelier. (Of course!)
- Small chest of drawers for personal clothing, and three hooks for hanging items.
- Potbelly stove for warmth during cold evenings and mornings.
- A microwave atop a mini refrigerator, along with a small table that includes a coordinating array of necessary utensils, dishes, and glassware.
- Plush rug
- Mirror for dressing and spruce up.
- Assorted baskets for storage of miscellaneous items.
My list of DOS and DON’TS when you design your own yurt … or small space
DOS:
- Include your favorite must have furniture, paying careful attention to scale.
- Purchase matching baskets that can store socks, craft necessities, kitchen items, DVDs, CDs, etc., and slide them under cabinets and chairs.
- Purchase plastic storage bins to store off-season clothing, shoes, purses backup necessities for the bathroom, and other miscellaneous must-haves, storing everything conveniently under your bed.
- Determine a color scheme and stick with it. Mine was red, white, and black, with a few dashes of green, yellow, and pink, just to add some kick.
- Pair down your kitchen equipment. You don’t need every piece of Tupperware and your entire collection of pots and pans.
- Consider lighting. If your mate is sleeping, where will you read?
- Utilize the middle of the room. A dining table can butt up to the back of your couch, creating a much-needed dining space.
- Thin out your collections. Less is more! Pack away the Lladros, Waterford, and vintage glassware to be able to display your collection of Alabaster bookends, bowls, and matching table lamp.
- Clean out your wardrobe. Again, less is more. If you haven’t worn it in a year, sell it at a consignment store, or donate it to the Salvation Army.
- Move part of your kitchen outside, weather permitting. Ours includes the refrigerator, microwave, recycle bins, a camp table holding the small electric grill, and a bowl of fruit. (No lamps!)
DON’TS:
- Try to cram in furniture that overtakes the space. Switch out a huge china cabinet for a more petite version.
- Go with eight dining room chairs when the space only holds four.
- Try to tell the story of a three-thousand-squarefoot home in a one-room space.
- Use every color of the rainbow.
- Forget to keep things tidy. Put your stuff away!
- Forget your mate. What will he/she need to feel comfy and cozy?